Modelo de rebanada
La función de corte permite al usuario dividir el modelo compuesto en z rebanadas, cada una de los cuales se convertirá en un componente. Esto es para los clientes que necesitan cortar una pieza que excede la profundidad Z del pórtico de la máquina, la longitud de corte de sus herramientas o el espesor del material que están utilizando. Una vez que las rodajas se han cortado en el CNC, entonces se pueden volver a montar para hacer la parte de profundidad completa terminada.
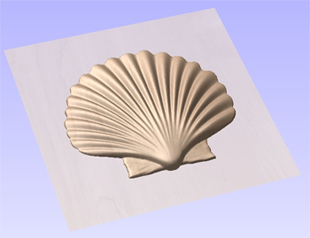
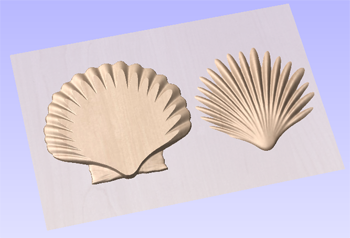
Cuando se ejecuta esta función, cada sector se convertirá en un componente en el árbol de componentes y, a continuación, se puede mover a su posición y tener rutas de herramientas calculadas sobre él. Un ejemplo de esto se muestra en las imágenes de abajo, a la izquierda se muestra un componente de vaciado de ornamento que tiene 3 pulgadas de espesor, la imagen de abajo derecha muestra esto dividido en dos componentes separados, cada uno un corte de 1,5 pulgadas del original.
Nota
Antes de utilizar el comando Modelo de rebanada, es importante asegurarse de ocultar los componentes que no desea incluir en la operación.
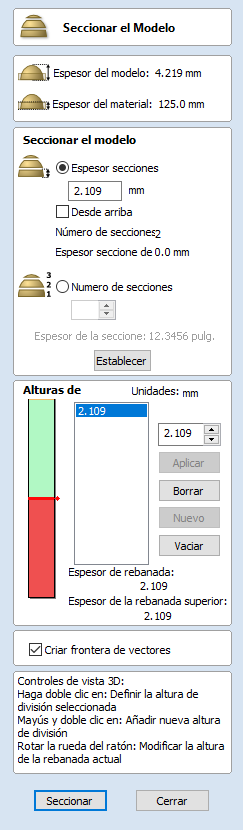
Cuando se hace clic en el icono, aparecerá el formulario Modelo de rebanada. Esto se puede utilizar para controlar el número y el grosor de las rodajas que se crearán. En la parte superior del formulario se mostrará cierta información de referencia que muestra el grosor del modelo compuesto actual y también el espesor de material definido actualmente (para el mecanizado).
 Modelo rebanada
The Model Slicing section can be used to set up the initial slices which can later be customized in the Slice Height section.
There are two ways to set up the initial slicing: by setting a standard slice thickness or by setting a fixed number of slices.
Espesor de la rebanada
Checking this option allows you to specify the default slice thickness. You can choose if you want to slice from the top down or bottom up using the From Top checkbox. Each slice is will be the specified thickness, except for the final slice which will be whatever height remains after all the other slices have been taken. If From Top is checked then the final and potenitally thinner slice will be at the bottom. If From Top is uncheched then the final and potentially thinner slice will be at the top.
Número de rebanadas
Marcar ✓ esta opción dividirá el modelo en un número específico de sectores. El grosor de la rebanada se determinará por el grosor del modelo compuesto dividido por el número de sectores definidos. Esta puede ser una buena opción si el espesor específico de la rebanada no es importante (por ejemplo, si no se relaciona con el grosor del material).
Ejemplo
Si el modelo compuesto tiene 3,96 pulgadas de grosor y define 3 sectores, el software creará 3 sectores de componentes cada 1,32 pulgadas de grosor.
Crear vectores de borde
Marcando ✓ esta opción hará que la rebanadora cree bordes vectoriales para cada sector. Estos pueden ser útiles para definir las regiones de mecanizado posteriores necesarias para cortar cada pieza. Los vectores de borde se colocarán en la misma capa en la vista 2D que la vista preliminar del componente para su sector de modelo asociado.
Modelo de rebanada
Al hacer clic en Modelo de rebanada, se aplicarán las opciones realizadas en el formulario y se crearán los componentes que representan cada sector del modelo compuesto.
Nota
El árbol de componentes conservará una copia de los componentes originales de la pieza, así como de los nuevos componentes de sector. Esto puede resultar en un modelo de aspecto muy grueso, ya que todas las rebanadas se agregarán a las formas originales. En este punto, puede eliminar, desdibujar o mover componentes antes de continuar con cualquier operación adicional.
Cerrar
Al hacer clic en Cerrar se cerrará el formulario Modelo de rebanada sin completar la operación.
Slice Heights
The Slice Heights section controls the specific details of each individual slice height. It also allows customization of the number of slices.
There are two many parts to the slice height control:
- The height bar which gives a visual indication of the slice heights
- The slice list which lists the slice heights using their z value
The slice height section is for editing the values at which the model is sliced and not the slices themselves.
Controlling Slice Thickness
A specific slice height can be controlled by selecting it from the slice list, updating the value and clicking
Updating the height of a specific slice might potentially adjust the thickness of the surrounding slices
Add New Slices
Additional slices can be added by either:
- Entering a specifc z height for the slice and selecting apply; or
- Double clicking on the height bar at a particular location
Removing Slices
To remove a slice height select it from the list and press the Delete button. Deleting a slice height will merge the surrounding slices into one slice.
3D View
When the slicing tool is open then the 3D view gives a visualisation of the results of the slicing. If a slice height is selected then:
- Red areas show which are included in this slice
- Green areas indicate that the component is above the slice height and so these will be sliced flat.
- The slice will occur between the Red and the green areas.
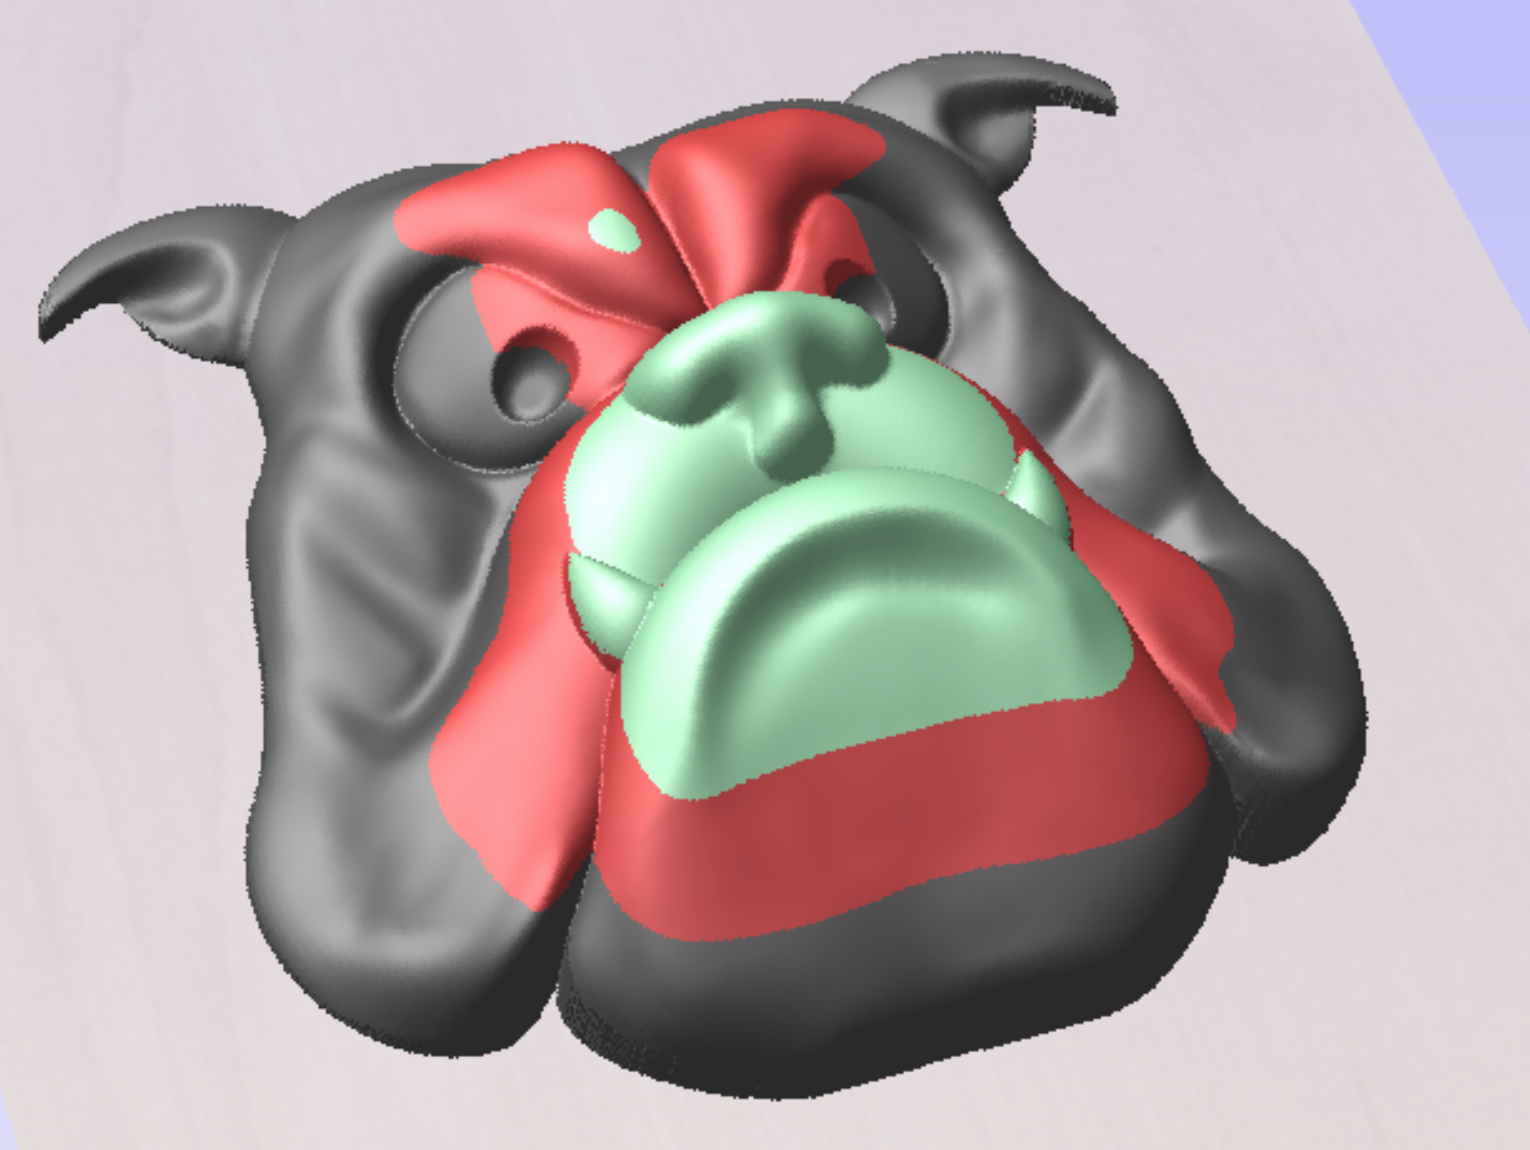
You can also manuipulate the slices within the 3D View
- Double clicking on the model will change the value of the active slice height to be equal to the clicked height.
- Shift + Double Click will insert a new slice height at the clicked height.
- Shift + Mousewheel up/down will raise/lower the actice slice height by a small amount allowing you to tweak the thickness to remove thin slices.